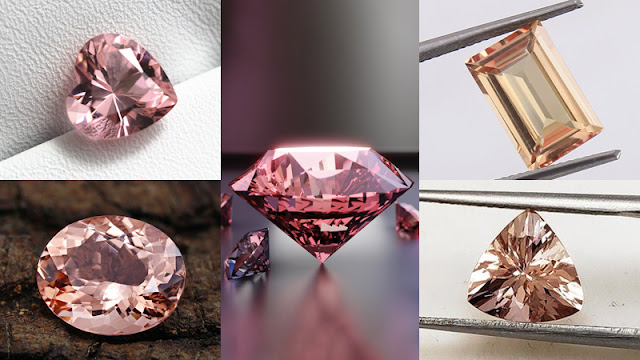
Morganite is a beautiful and versatile gemstone prized for its delicate pink and peach hues. This gemstone is a popular choice for jewelry, particularly in pendant form, because it adds a touch of femininity and elegance to your outfit. However, buying a ready-made morganite pendant can be expensive, which is why many people choose to make their own. In this article, we'll walk you through the steps to make your own morganite pendant.
Morganite: A pink gem of beauty and grace
Morganite is a variety of the mineral beryl, found in various colors, including pink, peach, green, and yellow. The pink and peach hues of morganite stone are the most popular, as they offer a soft and delicate color that is perfect for feminine jewelry. Morganite is also known for its durability, making it an excellent option for everyday wear.
A step-by-step guide to making your own morganite pendant
Making your own morganite pendant is a simple and affordable process that can be completed with just a few materials. Here's a step-by-step guide to help you get started:
1. Choose Your Morganite
Selecting the proper gemstone is the first step in creating your own morganite pendant. Morganite can be found in a wide range of sizes, cuts, and pink tones; pick a stone that speaks to you. To find the best morganite, shop for stones that meet these criteria: the good size of morganite, and with no inclusions on it.
2. Attach the connector or bail
Now, the morganite is ready for the bail or connector to be attached. To facilitate its use as a pendant, a bail is affixed to the stone in the form of a tiny loop. Connectors are little pieces with a circle and a flat base that can be added to an existing chain or cord. Bail can be attached to a stone by sliding it through the opening and then crimping the end with pliers.
3. Embellish your pendant
It's an optional step, but it's an excellent way to make your morganite pendant unique. To make a one-of-a-kind accessory, simply attach beads, charms, or whatever else you like to the bail or connector according to your style.
4. Join the jump rings.
Jump rings are added after the bail or connector has been placed. They are tiny metal rings used to secure the pendant to the necklace. To attach the jump rings to the bail or connector, open them with pliers, slide them through the loop, and then close them.
5. Choose your chain
The last step is choosing a chain for your morganite pendant. Again, materials such as gold, silver, and platinum are available to find something that suits your style. Next, connect the jump rings to the chain and extend them so they can be worn around your neck without causing discomfort.
Simply put, that is everything! You can make your own gorgeous morganite pendant with these simple steps.
Last piece of the puzzle
Making your own morganite pendant is a simple and affordable process that allows you to create a unique and personal piece of jewelry. Whether you're looking for a unique gift or want to add a touch of elegance to your outfit, a homemade morganite pendant is perfect.
Following the steps outlined in this article, you can create a beautiful and one-of-a-kind morganite pendant that will become a cherished and treasured item in your jewelry collection. So why not try it and see what beautiful and unique creations you can make with morganite pendants?


Comments
Post a Comment